
There was a time when you would find Juno Email somewhere among the best webmails around. More than just that, Juno has been there for a very long time offering a lot of other services including general email services and other internet services. When Juno email began in 1996, it afforded users the opportunity to send and receive as much as 35KB of messages. Even though this may seem very little today, it was huge then. By 1998, it had already become a premium service provider.
Years down the line, Juno mail has gone missing from the list of the top email service providers with less than 10 million subscribers. The main reasons why the service has failed to sustain is because it is not the best when it comes to compatibility with most of the latest browsers and it happens to be very slow.
That said, there are still many people who still use Juno email on the web for one reason or another. The email services are available both for free and paid subscription.
Juno Email On The Web
Compared to the setup on other devices, it is pretty much straightforward setting up the Juno email on the web. You do not need any special technical skill or anything out of the ordinary to have your account opened. While it may not necessarily be as easy or straightforward as opening many other emails, it is not hard either. Here are the processes to follow:
Step 1: The first thing you would want to naturally do is to head to Juno’s website.
Step 2: On the right-hand side you will see the notification: Not a Juno Member? Under this, click on “… to sign up now, Click Here.”
Step 3: You will be taken to a page with all the services offered by Juno including its Premium Packages. Simply look for Free Services and then click on Free Email.
Step 4: The next thing to simply do is to click on the Order Now button which will lead you to a page to enter your information.
Step 5: Before entering your details, you may decide if you want to upgrade the package, although you may be better off with the free service so simply enter your necessary details and select the ID you want to use. Once you are through with that, simply click on the Submit and Continue button.
Step 6: After submitting your information, which is all correct, you will have a small box welcoming you to the Juno Message Center. On it, click on continue and you will be taken to your Juno email account. Simply click on Continue and you will be taken to your email where you can now send and receive messages easily.
How To Login
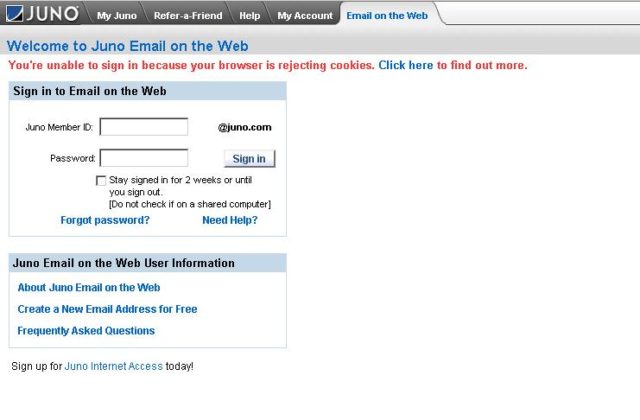
After you must have opened your Juno email on the web, the only thing that can be easier is to log into the account itself. Here are the simple steps to take:
Step 1: Simply go to the Juno website.
Step 2: You will see My Account. Click on this and you will be taken to another page with a form to enter your login details.
Step 3: Sign in and you can now decide to read your emails or send one if you need to.
Juno Email Setting
Here are the Juno IMAP and SMTP email settings:
Incoming Mail Server:
- Account Type: POP
- Username: This is your username and not your email.
- Server hostname: pop.juno.com
- Server port: 995
- Authentication: Password
- SSL/TLS: Yes
Outgoing Mail Server
- Account Type: SMTP
- Username: Your Username (not to be mistaken with email)
- Server hostname: smtp.juno.com
- Server port: 465
- Authentication: Password
- SSL/TLS: Yes
The above incoming mail server and outgoing mail server settings work for Juno server settings on both Android and iPhone, as well as on outlook and Windows phone app.
Personal Start Page
Juno email comes with various features including the personalization of your startup page. Thanks to this feature, you will be able to customize your page based on how you want it to be. For the page personalization, here are some of the important features:
The default color of Interface
You can easily change the color of the background of your interface as well as the color of text and links. To set this, you will go to the menu and select Appearance. It is here that you will find the options to make the changes you need.
Mail Signature
One of the most useful personalization features to use is the mail signature which sets a signature that will display on all the emails you send. Go to Edit and then select Signature, and finally click on Create Signature. Once you input the signature you want, it will appear on all your outgoing emails.
Offline Mail Reader
This feature makes it easy for you to access your emails even when you do not have an internet connection. To activate and use this feature, you will go to the advanced setting of your account. Because this will check and get the messages for you from time to time, the data will be charged when it is checking your emails so that you don’t get charged when you come to read them offline.
See Also: What is Sbcglobal? Email Login, Settings, Support, Customer Service
Apart from all the features that allow for personalization, the Juno personal start page provides you personalized information and tools when you are logged in. Things such as news stories, movie, local weather, and much more are all personalized in the start page.
More Questions
How do I get my Juno email on my iPhone?
To set Juno on your iPhone, here are the steps to follow:
1. On your iPhone, go to settings > Mail, Contacts and Calendars > Add Account > and then select Other
2. Tap Add Mail Account and put in this information:
Name: your name
Email: your Juno email-address
Password: your Juno email-password
Description: enter “Juno”
3. Under incoming mail server, select POP3 and put in the details from settings above
4. Under the Outgoing mail server, also put in the above-provided settings
5. Save the settings and head back to “Mail, Contacts, Calendars”
6. After selecting your Juno account, tap “Advanced”
7. Go to the Incoming Settings section and in the field for “Server Port”, change the value to 995 and then On the Use SSL toggle.
How to Set Up a Juno Email on Android?
1. On your Android phone, go to your mail app and then select setting.
2. Select Choose pop3
3. Put in your Juno email address and password
4. Under incoming settings, put in the related above settings and do the same for the outgoing settings
5. Put in your remaining configuration details and you are good to go.
Note: If you are using the Gmail app, you can log go to Settings > Add Account > Other, and then put in your Juno Mail. Click next in manual setup and continue from there with the steps above.