
TP-LINK’s range extender is an amazing tool that supports firmware upgrade, web management, built-in DHCP server, web management, and even one operating modes, which is the range extender. It also connects to users’ router wirelessly and also expands its signal into places it can’t on its own. Users of this device are presented with the opportunity to have their office or home covered with reliable WiFi through the reduction of signal interference by this range extender. Here, you will learn all there is to know about TP Link WiFi range extender, particularly how to set it up, log in or reset it.
What Is TP-Link WiFi Range Extender?
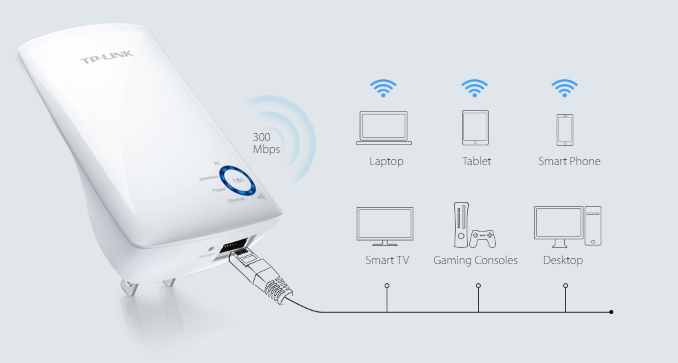
TP-Link Wifi range extender is a tool designed to provide wireless network solution to Small Office/Home Office (SOHO) and to expand users’ existing mobility and wireless coverage within their wireless network while giving them the green light to also connect a wired device to a wireless environment. This extender can work together with IEEE 802.11n wireless technology, and when this is done, it can effectively transmit wireless data at the rate of up to 300Mbps.
The TP-Link Wi-Fi Range Extender also guarantees complete data privacy with the aid of several protection measures such as Wi-Fi Protected Access (WPA2-PSK, WPA-PSK) and wireless LAN 64/128/152-bit WEP encryption. By hitting the RE button located on the front panel, the extender can easily connect to the root AP (equipped with WPS/QSS button) via a wireless connection. If you are wondering if it backs up a web-based setup for management and easy installation, the answer is yes it does.
How It Works
If you have an extender and you find that the RE is on, it means the device is connected to your router; if it is blinking, it shows it is simply establishing a connection with your router, and when it is off, it is an indication that the extender is not connected to your router.
Talking about its signal strength, when it is on, you need to watch out for the number of lit LEDs that appears on it as it is a pointer to the strength of the wireless signal. When it is off, it shows the extender is not connected to your router and if it is blinking, it shows it has established a connection to your router but has no Internet access yet.
When the Ethernet is on, it means its port is connected; if it is off, then it is not connected and if the Ethernet is blinking, it means its port is transmitting data.
When the wireless icon is blinking, it shows the wireless function is working very fine and if it is off, it is an indicator that the wireless function is not working.
As you already know, when the power is off, it means the TP-link WiFi range extender is off and when it is on, it shows the device is on.
How To Login
Logging into TP-Link Wifi range extender is very simple. All you need to do before logging into the Web-based Interface is to assign a static IP address on your computer. To begin, do the following:
1. Along with an Ethernet cable, connect your computer to the LAN port of TP-Link.
2. Manually assign a static IP address on your computer. You can reach out for one immediately if you don’t know how to assign a static IP for your computer.
3. Launch a web browser and enter the IP address of the access point/extender into the address bar. Note that the Default IP address is 192.168.1.1/192.168.1.254/192.168.0.254.
4. Press Enter.
5. On the login page, enter the password and username in the boxes provided. In case you don’t know, the default password and username are both ‘admin’.
5. Finally, click on OK.
How To Set Up TP-Link WiFi Range Extender
To set up your range extender, simply follow the steps below:
1. Start by plugging your TP-Link Wifi Range Extender into a power outlet close to your main Router/AP.
2. On your main Router/AP, push the WPS button and then push the WPS button on your Range Extender immediately.
3. It is expected that the WPS process will last for 2 minutes, after which you can now check your Range Extender’s wireless signal LED. How do you know that your extender has been connected to your Router/AP?. It is when the wireless signal LED is on regardless of how many signal bars it has or its color. So, once it is on, just know that your Range Extender has been connected to your main Router/AP.
4. You can still have a failed WPS process after trying to connect for 2 minutes. Yes, if the wireless signal LED of your Range Extender is still off after 2 minutes, then it means the WPS process did not pull through. In such a case, you may need to keep trying the WPS operation until you succeed or you can simply repeat the steps above.
5. Once you have successfully connected the device to your main Router/AP, you can now gently place it in a proper place or maybe where exactly you want its coverage to be extended. Remember you don’t need to repeat the setup process because once it’s been successfully done, it connects automatically every time you plug it back. All you need to do is to enjoy the extended wireless network.
Have the following points in mind:
1. Once you have pushed WPS button of your Router/AP, make sure you don’t wait till after two minutes to push WPS button of your Range Extender. We strongly propose you should push WPS button of your RE product immediately after you have pushed WPS button of your router.
2. Your Router/AP’s WPS LED should blink immediately after you are done pushing the WPS button of your Router/AP. Now, if your Router/AP’ WPS LED doesn’t blink after doing this, it then means you need to re-push the WPS button until your Router/AP’s WPS LED blinks. The same reason goes for RE product. The WPS/RE light of your Range Extender suppose to blink after pushing the WPS button of your Range Extender, If it fails to do so, then you need to push again.
See Also: TP Link: Login, Drivers, Default Password, Customer Service
How To Reset TP-Link WiFi Range Extender
There are two methods you can use to restore the TL-WA850RE 300Mbps Universal Wi-Fi Range Extender’s factory default settings. You can use any of them to achieve this task.
Method One
1. Power on the Range Extender.
2. Use a pin to press and hold the RESET button for about 8 seconds, when the LED is expected to become quick-flash from slow-flash.
3. Release the button and then patiently wait for the Range Extender to reboot to its factory default settings.
Method Two
You can as well reset the device to the default settings using this method. All you need to do is to:
1. Navigate to the Range Extender’s Web-based management page.
2. Go to “System Tools > Factory Defaults” of the page and activate it. That’s simple.